Are you a Windows PC user? Has your PCI Serial Port driver suddenly stopped functioning? Then, it’s probably happening because your PCI serial port driver has become obsolete. Quite lately, many Windows PC users have reported the same issue. So, if you are also concerned about this then you are not alone. Fortunately, the issue can be fixed easily & quickly just by updating the corresponding drivers. To help you, we have prepared this guide. Here we are going to show you the two easy ways to update PCI Serial port drivers.
Quick Methods to Fix PCI Serial Port Driver Issues on Windows 10, 8, 7
Check out the methods explained below to easily update and fix PCI serial port driver issues on your Windows PC. Without further ado, let’s get started: Use Bit Driver Updater to resolve PCI Serial Port driver issues, easily & quickly. Bit Driver Updater is an effective and complete solution to fix all faulty driver-related issues. It automatically recognizes your system and then provides you with a detailed list of drivers that need to be updated. Moreover, it requires only one click to update all outdated device drivers. From the below-provided download link, you can try it for Free.
Method 1: Update PCI Serial Port Driver in Device Manager
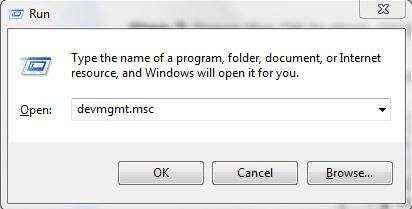
Windows has a default utility program called Device Manager that shows the graphical representation of the hardware and its drivers. So, you can use Device Manager to check and update the outdated device drivers on Windows PC. Below is how to fix PCI Serial Port driver issues on Windows using Device Manager: Step 1: Launch the Run Dialog box by pressing the Windows logo and R keyboard buttons at a time. Step 2: Copy and paste devmgmt.msc in the box and press the Enter key from your keyboard.
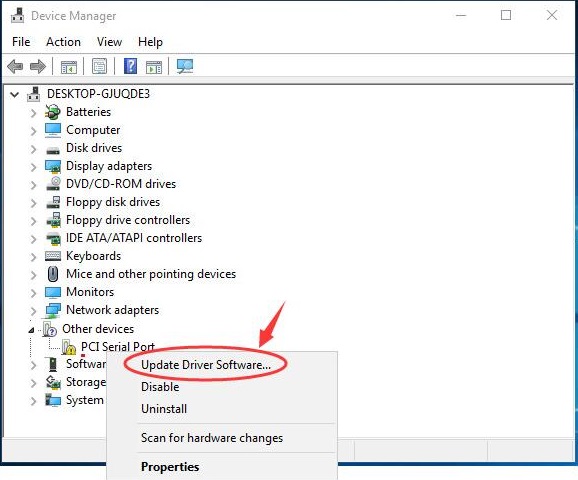
Step 3: This will invoke the Device Manager window on your computer screen. Here you need to navigate to the Other devices section and double click on it. Step 4: Then, locate PCI Serial Port and right-click on the same. Step 5: Next, choose the Update Driver Software.
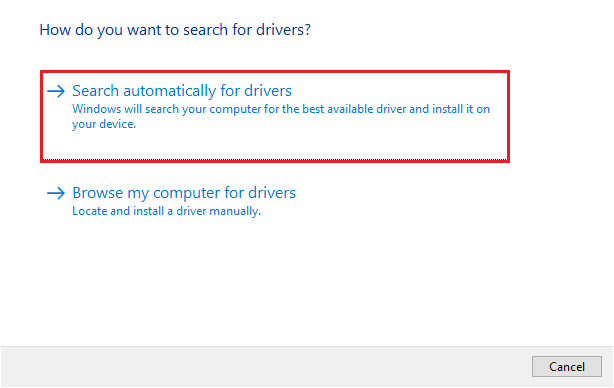
Step 6: Select Search Automatically for Updated Drivers Software.
Now, Device Manager starts searching for the latest version of PCI Serial Port drivers; if Windows finds any available driver updates, it will install the update automatically. Important Note: Sometimes, Microsoft lags detecting the latest driver updates for your device. In that case, try another method mentioned below. Also Read: USB 3.0 Driver Download and Update for Windows 10, 8, 7 {Quick Tips}
Method 2: Use Bit Driver Updater to Automatically Update PCI Serial Port Driver (Recommended)
Bit Driver Updater is a software tool that automatically recognizes your device and finds the most suitable driver updates for you. The software is also a perfect fit for resolving numerous Windows-related issues like Blue Screen of Death errors and more. Unlike others, this driver updater software only provides WHQL tested and certified drivers. This is a more precise method to fix PCI Serial Port driver issues on Windows PC. You can even perform bulk driver downloads at once with this super-amazing driver updater utility tool. Using this complete automatic solution, you can also avoid the risk of installing the wrong or faulty drivers. In addition to this, you do not need to know the exact PC information. To update PCI Serial Port drivers with Bit Driver Updater, follow the steps below: Step 1: From the download button below, get the installer of Bit Driver Updater.
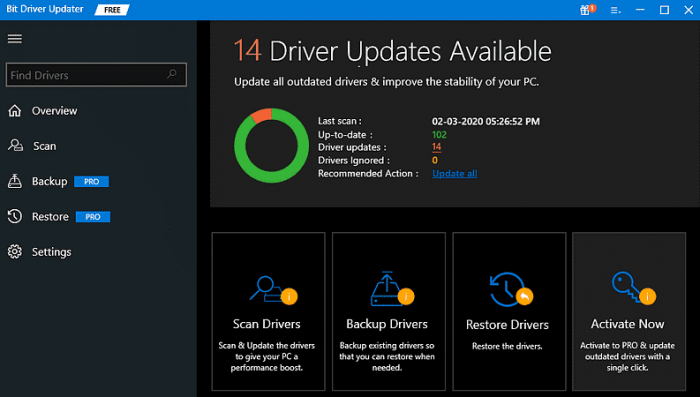
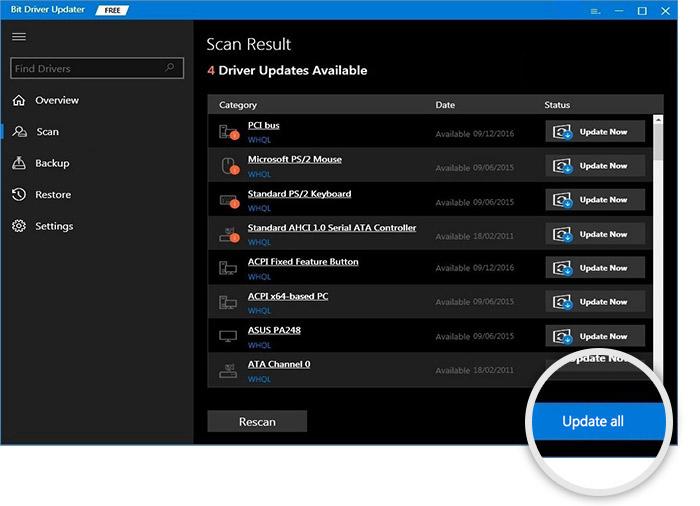
Step 2: After that, finish the installation instructions to complete the process. Step 3: Once installation is done, invoke the Bit Driver Updater on your computer and click on Scan.
Step 4: Next, check the scan results and click on the Update All button. See how easy and convenient it is to update or fix all driver-related issues with Bit Driver Updater. In order to unlock its complete functionalities, you need to upgrade to its pro version. Also, it offers round-the-clock technical assistance and a complete money-back guarantee. Also Read: Microsoft USB Driver Updates Completely Free For Windows 10, 8, 7
Bonus-Tip: How to Uninstall and Reinstall PCI Serial Port Driver
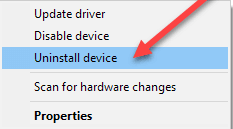
If updating the PCI drivers doesn’t work for you, then try to reinstall the drivers. For this, follow the steps shared below: Step 1: Launch Device Manager. Step 2: Locate and double-click on the Other Devices category. Step 3: Right-click on PCI Serial Port and choose Uninstall Device.
Step 4: Click yes, if a box prompts asking for your confirmation. Step 5: Wait for the process to complete. Once done, then visit the PC manufacturer and install the PCI serial port drivers again. Now, your PCI serial port drivers should be working fine as expected. Also Read: How to Fix Ethernet Port Not Working on Windows 10 – Quick Tips
PCI Serial Port Driver Issues on Windows 10, 8, 7: FIXED
So, by updating the PCI serial port drivers, one can easily fix the issues related to the same. Hopefully, this troubleshooting guide helps you in the best way possible. Please let us know in the comments below if you have any doubts or further suggestions. Additionally, subscribe to our Newsletter and follow us on Facebook, Twitter, Instagram, and Pinterest for more tech-related articles or pieces of information.