Windows 11 will likely come with plenty of pre-installed applications that you won’t find helpful. What’s even worse is that these programs or applications will frequently use resources, thus ending up making your system vulnerable and slower. If that is the case, then consider debloating Windows 11 to speed up your PC performance. Debloating is crucial for maximizing your device’s performance. It lets you deal with any programs or applications you no longer need and excessively consumes system resources. There are numerous ways to completely debloat Windows 11. But, before we move further into the discussion, it would be beneficial to understand what software debloating is.
What is Debloating?
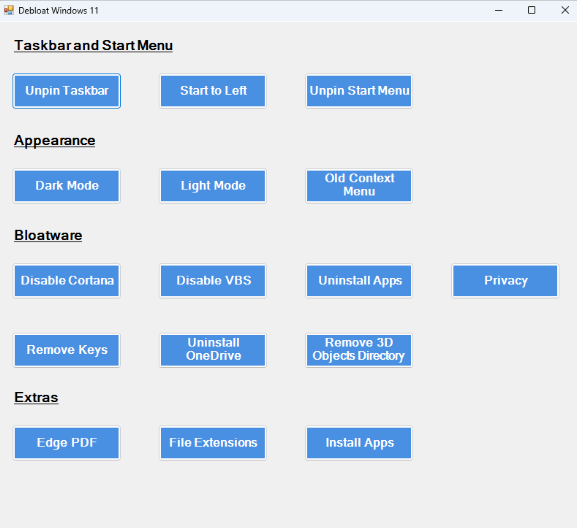
Debloat simply refers to the procedure of removing and deleting unnecessary processes, services, and applications from Windows 11. Such apps & services are invasive or may constantly run in the background, wasting system resources & battery life, and collecting data.
Ways to Debloat Windows 11: Complete Guide
In this section, we are going to put together different methods to debloat Windows 11. For more information, read further!
Way 1: Using Traditional Uninstall Methods
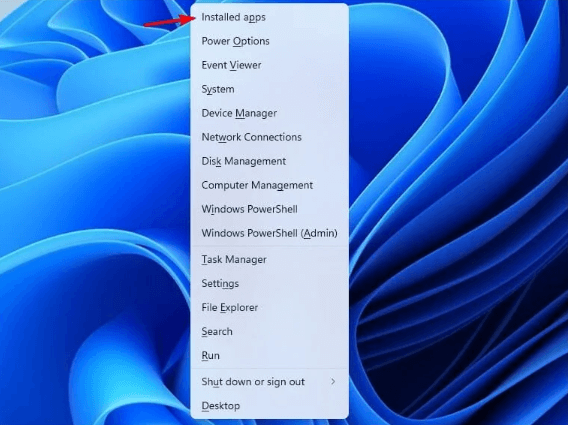
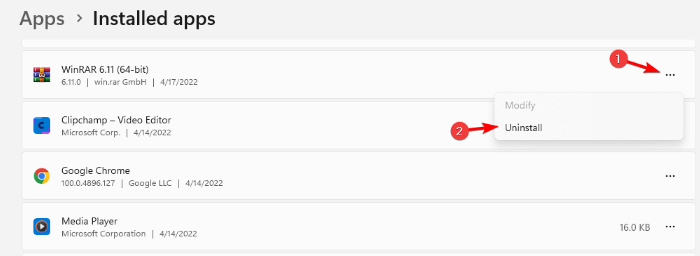
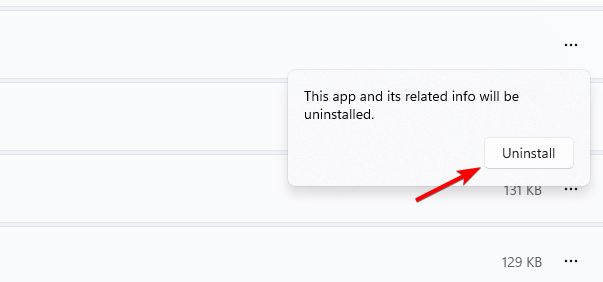
Follow the steps shared below to uninstall the installed applications that you may find useless. Step 1: Press the Windows and X buttons on your keyboard and choose Installed apps from the quick access menu list. Step 2: Navigate to the list and check which apps & services you no longer need. Step 3: After that, make a click on the three dots beside the application you want to delete. Step 4: Next, choose Uninstall to proceed. Step 5: Then, a confirmation box will appear, click Uninstall to continue. Step 6: You can repeat the last two steps for the programs or applications you want to delete. Also Read: How to Find the Windows 11 Startup Folder Location
Way 2: Use PowerShell to Debloat Windows 11
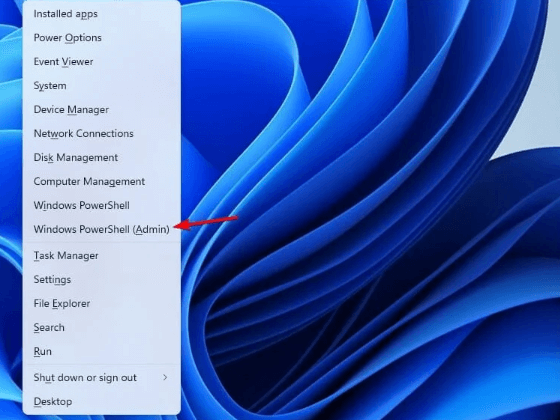
In Windows 11, the Windows debloater can give you an option to erase all bloatware. Here is how to debloat Windows 11 through PowerShell. Step 1: Hit Windows and X keyboard keys together and choose Windows PowerShell (Admin). Step 2: Type the following command in the Administrator: Windows PowerShell.iwr https: //git.io/debloat11 |iex Step 3: After that, choose the components in the Bloatware section that you wish to remove and comply with the on-screen instructions to proceed. A Point to Remember: Undoubtedly, this utility tool can help you delete items/programs that make your device slower and even speed up your Windows 11. But, if you are not familiar with what something does here, it is recommended to not do it.
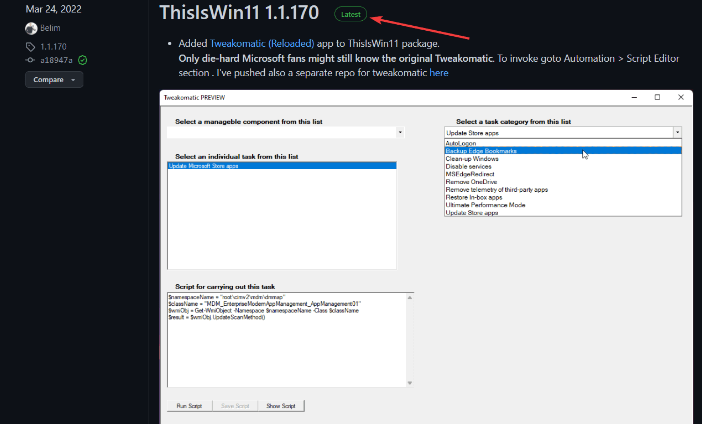
Way 3: Use Windows 11 Debloater from GitHub
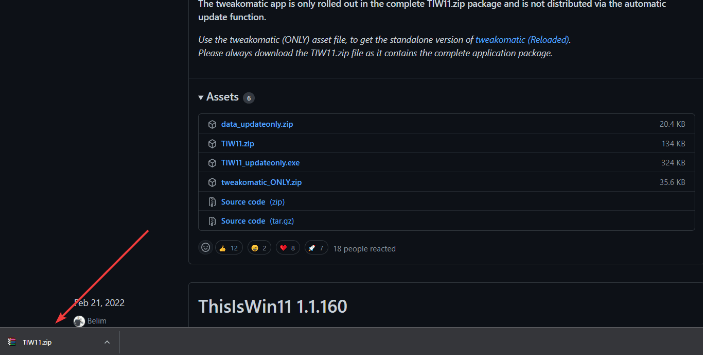
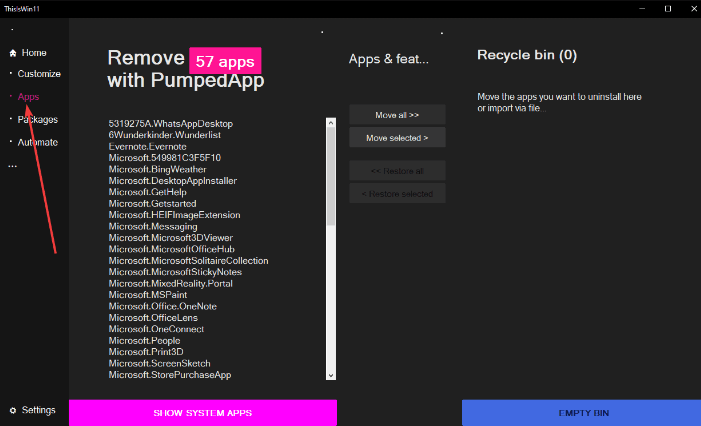
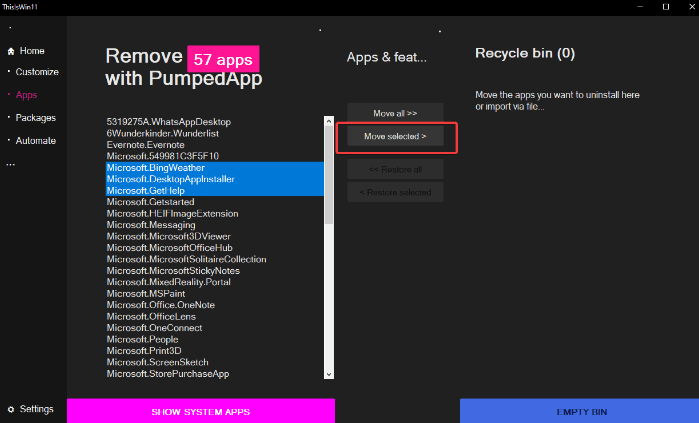
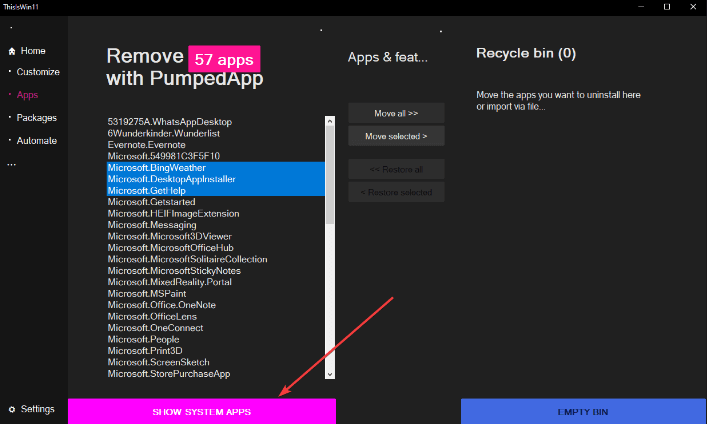
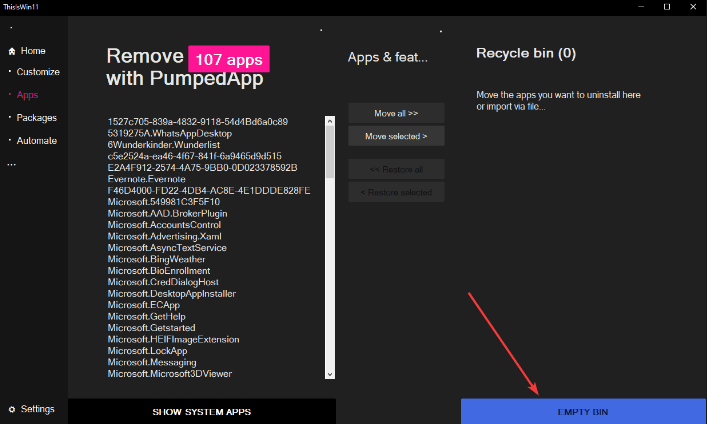
Remove the unnecessary applications, in no time, by following the below-mentioned steps. Step 1: Go to the ThisIsWin11 Github page. Step 2: From the assets section, choose the TIW11.zip option. Step 3: This will start a download for this .zip file. Step 4: Double click on the downloaded zip file to open it. Step 5: Also, you can comply with the file to the download section and choose the Extract all option. Step 6: Once the file has been uncompressed, search for the ThisWin11.exe file and double-click on it. Step 7: Next, click on Run Away. Step 8: After that, click on Apps shown on the left side of the screen. Here you will see a list of all the apps. Step 9: Hit the CTRL button and hold it for a few seconds to choose the apps you want to remove. Step 10: Next, click the Move Selected button to move the selected applications to the recycle bin. Step 11: You can also click on the Move all option. This way you can remove all the applications in one click. However, this isn’t advisable. Step 12: If you want to remove System apps, incorporating those that Windows won’t allow you to uninstall, click Show system apps to see them. Step 13: Next, use the CTRL and click method to choose multiple applications. Step 14: Then, make a click on the Move Selected option to proceed. Step 15: Clean your recycle bin too by clicking on the EMPTY BIN option. Here, you have successfully removed the unwanted applications on your device and freed up a huge amount of resources which eventually improves the performance of your Windows 11. Also Read: How to Enable Desktop Stickers in Windows 11
Way 4: Use DISM to Debloat Windows 11
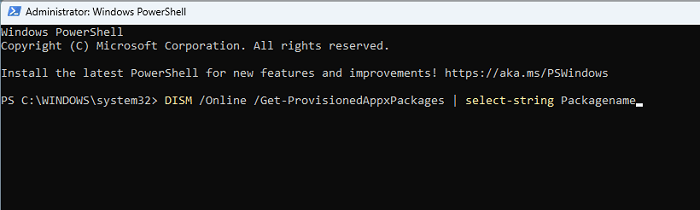
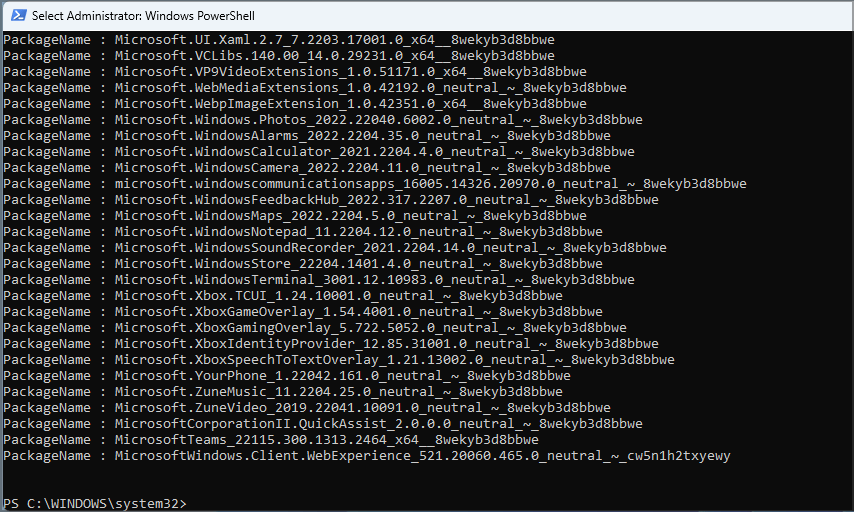
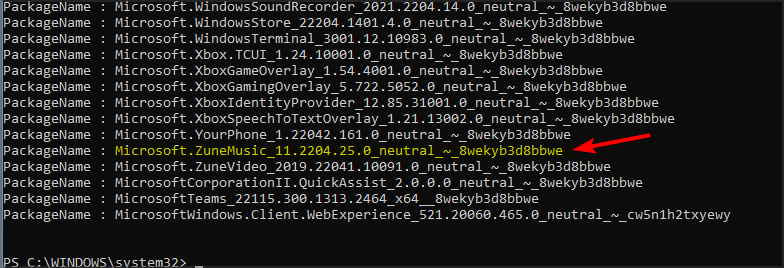
Last but not least, you can also try running the DISM command to remove the applications you no longer need. Follow the steps below: Step 1: Simultaneously, press the Windows and X keys from your keyboard to invoke the WinX menu. Step 2: Choose the Windows PowerShell (Admin) from the available options. Step 3: Run the following command:DISM /Online /Get-ProvisionedAppxPackages | select-string Packagename Step 4: Now, the script will show you all the packages installed on your Windows 11 system. Step 5: Go through it manually and see which applications you would like to delete. Step 6: Once you find the app, highlight that application and click on the CTRL + C keyboard buttons to copy the same. Step 7: Copy the script, and make sure to utilize the name of the package you wish to remove at the end. Step 8: Lastly, press Enter to successfully remove the application from your PC. The script method is pretty simple to debloat Windows 11, but you will need to run the same process multiple times to delete all the affected applications.
Closing Words
So, that was all about how you can easily delete all sorts of system junk that come preloaded with Windows 11. Not only that, but you can also disable all the services that occupy an ample amount of space or resources in the background. We hope you find this tutorial on how to debloat Windows 11 for improving productivity and performance helpful. If you have any questions or further information to add then please let us know in the comments section below. Furthermore, do subscribe to our Newsletter for more tech-related articles and troubleshooting tips. Apart from that, you can also follow us on our Social Media handles: Facebook, Twitter, Instagram, and Pinterest.